I started my makeup case/small case project by adjusting the length of the zipper. I needed a 40 cm zipper, but the only available option in orange was 45 cm, so I cut the zipper down to the right length. After cutting the zipper, I covered the raw ends with small pieces of fabric, sewing them onto both ends to secure it and give it a neat finish.
Next, I prepared the main fabric pieces for the body of the case. To make the case thicker and more stable, I ironed interfacing fabric onto the back of the main fabric pieces. This made them stronger and more stable.
After that, I sewed the zipper to the main fabric pieces using a straight stitch. I used small pieces of fabric to cover the beginning and end of the zipper and give it a neater finish. These fabric pieces helped ensure a clean and professional look when sewing the sides together.
The final result is acceptable, but if I were to make this design again, I would definitely change how I sew the fabric to the zipper. I would fold the fabric before sewing it to create smoother and more professional-looking edges. I really like how the orange zipper adds a bright and cheerful touch to the case.
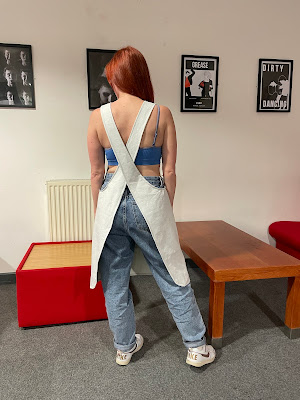
I didn't take many photos during the apron sewing process, but it was definitely the quickest and easiest project of these designs. After cutting the material from the pattern (as shown in a previous post), I added a lino print pattern to one of the pockets. Then, I decided to incorporate some orange into the design. I found a few pieces of dyed cotton material from a previous dyeing workshop that matched a similar orange tone, so I cut it to size for the second pocket. To make it stronger and more durable, I ironed the interfacing fabric onto the back.
First, I sewed all the sides of the apron to make the edges look more professional and prevent the material from tearing. Then, I prepared the pocket using the same process.
I decided to sew one pocket slightly overlapping the other to add more visual interest. Then, I marked the spot on my apron where I wanted to sew it. I used a disappearing marker for this step.
I started sewing the pockets by attaching the grey side to the orange one. I did this first to avoid accidentally sewing the lower pocket if I started sewing them directly onto the front of the apron. Once this step was done, I proceeded to sew them directly onto the apron. I started with the orange pocket because if I had begun with the grey one, I would have covered one side of the orange pocket, making it impossible to sew it on.


To finish the apron, I simply sewed the arm apron together. While the final look isn't bad, it could definitely be improved. The sewing on the sides of the apron could have been done more precisely, especially around the rounded parts. The pockets also don't look very professional, but considering it was my first time, they're not that bad. However, I believe adding the orange pocket to the design was a very good idea; it added uniqueness and connected it with the rest of the projects.
If I were to make it again, I would definitely experiment more with the pockets, perhaps by changing their sizes: making one bigger or smaller. I might also consider sewing vertical seams into the pattern to create small sections, for example, to hold a spoon or a brush. These adjustments could add functionality and further upgrade the design.
The entire collection, including the tote bag, apron, and small case, has a consistent look that ties them together. You can easily see that they belong to the same collection, as they share similar design elements and colour schemes.


Good evaluation and reflection on how you could upgrade the designs
ReplyDelete