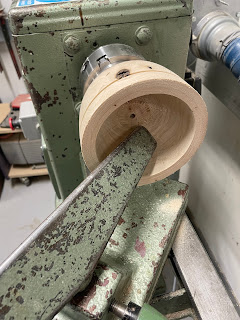
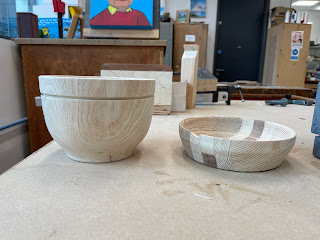
Starting my 3D bowl project, I'm excited to experiment with combining wood and epoxy resin for a unique and modern aesthetic. First, I used different coloured wood pieces and glued them together to create a mix of tones. Then, I waited 24 hours for the glue to set. After that, I marked the centre point to guide where to attach the shaping tool from the machine for forming the bowl shape.
Using a wood lathe and specialized tools, I shaped the wood into a bowl form.
Roughing Gouge: This tool helps shape the inside and outside of the bowl by cutting away wood.Scraper: It's used to smooth and refine the surface of the bowl after shaping.
Spindle Gouge: helps shape curves and add detail (Woodworking Wisdom, 2020).After shaping the bowl with the wood lathe and special tools, I finished by smoothing the surface using sandpaper.
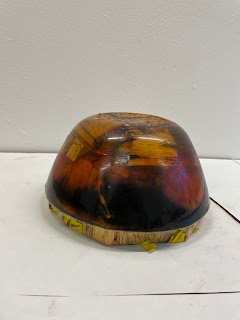
Unfortunately, I couldn't add epoxy resin to the finished bowl shape. So, my next step was to mix the wood with epoxy resin before moulding them into a bowl shape. To do this, I found a plastic bowl with dimensions no larger than 20x26 cm. Then, I placed the wood pieces into the plastic bowl and added tape to the top to prevent them from coming out. After that, I mixed the epoxy resin and poured it into the bowl to cover all the wood. To recreate a fire theme, I used a combination of orange and black colours of epoxy raisin.
After adding the epoxy resin over the wood, I used a vacuum chamber to get rid of bubbles. Because the chamber isn't huge, I had to use a plastic bowl no bigger than 20x26cm. Bubbles are common in epoxy resin because air gets trapped inside the mixture. When the resin hardens, these bubbles can spoil the finish. The vacuum chamber helps by reducing air pressure, which makes the bubbles rise up and disappear, leaving the final product smoother (Wier, n.d.).
Reference List:
Wier, A. (n.d.). Ways to improve resin casting: pressure and vacuum chambers. [online] Available at: https://www.betweenthebolterandme.com/2017/05/ways-to-improve-resin-casting-pressure.html [Accessed 6 May 2024].


No comments:
Post a Comment